Day 52 - Origami chicken
It's a simple traditional model and starts similar to the origami wild duck,crow and ostrich model. I have used a white sheet for the purpose so the photo instructions may not be that clear.
Its 2D model so useful for greeting cards etc..
Folding instruction:-
Diagram:-
Origami club
Photo Instruction:-
Step 1:-
Fold the square diagonally to make a crease

Step 2:-
Fold to the center line


Step 3:-
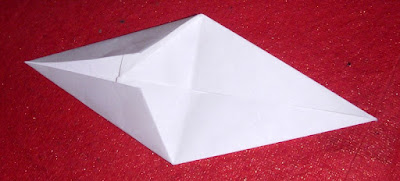
Open the pocket and flatten sides to form traingle

Step 4:-
Fold the triangles so formed as shown below

Step 5:-
Fold in half and reverse the fold of the 2 triangle forming the leg as shown below


Step 6:-
Further fold the leg to slim it as shown below

Step 7:-
Pocket fold to get the neck


Pocket fold to get the tail

Step 8:-
Pocket fold to get the head and the tail


Step 9:-
Fold to get the face and hood.


Step 10:-
Fold outwards as shown below at the neck to get a slimmer neck

Step 11:-
Paint the hood red and draw an eye on the face of the chicken .

It's a simple traditional model and starts similar to the origami wild duck,crow and ostrich model. I have used a white sheet for the purpose so the photo instructions may not be that clear.
Its 2D model so useful for greeting cards etc..
Folding instruction:-
Diagram:-
Origami club
Photo Instruction:-
Step 1:-
Fold the square diagonally to make a crease

Step 2:-
Fold to the center line


Step 3:-
Open the pocket and flatten sides to form traingle

Step 4:-
Fold the triangles so formed as shown below

Step 5:-
Fold in half and reverse the fold of the 2 triangle forming the leg as shown below


Step 6:-
Further fold the leg to slim it as shown below

Step 7:-
Pocket fold to get the neck


Pocket fold to get the tail

Step 8:-
Pocket fold to get the head and the tail


Step 9:-
Fold to get the face and hood.


Step 10:-
Fold outwards as shown below at the neck to get a slimmer neck

Step 11:-
Paint the hood red and draw an eye on the face of the chicken .

No comments:
Post a Comment