Showing posts with label 2D. Show all posts

Tuesday, August 1, 2017

Origami Crab 1


Model : Origami Crab 1
Folding Instruction :
    Photo Instructions Origami-club
    Video Origami-club
Paper : 5*5 Inch double side coloured origami paper


I wanted to fold a crab and found a few designs.This is a simple origami.Though its not very convincing but yet easy to fold and try.I found the instruction on Origami-club.

Here is the photo instruction of the folds...


Thursday, May 5, 2011

Origami Alice Gray Butterfly - Design by Michael LaFosse

Day 153 - Origami Alice Gray Butterfly - Design by Michael LaFosse

Model : Origami Alice Gray Butterfly
Design : Michael LaFosse
Complexity : Medium
Folding Instruction
    Diagram : Diagram by J.C Nolan
    Book : Advanced Origami
    Video : Origamiancy
Paper : 9*9 inch one side coloured paper.


Earlier I had tried Michael LaFosse's Alexandar swallowtail butterfly .The instruction for this butterfly was available on the website by Michael LaFosse.

There were many more wonderful butterflies modeled by Michael Lafosse which I wanted to fold but could not find the instruction online neither I am that good at following the diagrams.Finally after one and a half years of folding Alexander swallowtail butterfly I found this video on YouTube by origamiancy for the model Alice Gray Butterfly by Michael Lafosse.The video was up by 2009 and I found it now that show how good I am at searching things on internet.

The instructions are quite clear.One thing to take care of ,is the instructions in the video starts with colour side up but if you want your butterfly to be colourful then start with White side up.

By the time your are finished the paper in the middle forming the body of the butterfly becomes so thick that its difficult to make further folds and it may rip so take care while folding it.

Video:-

Saturday, April 30, 2011

Origami Maple Leaf

Day 148 - Origami Maple Leaf

Model : Origami Maple Leaf
Design : Traditional
Complexity : Simple
Folding Instruction
    Diagram : Origami-club
    Animation : Origami-club
Paper :3*3inch one side coloured square

A very simple model for maple leaf .It uses the standard Origami bird base.The flaps of the bird base are turned into the leaf.

You would need a small piece of paper and a little glue to make the stem attached to the leaf.

Friday, April 15, 2011

Origami Cat - 3

Day 134 - Origami Cat-3

Model : Origami Cat-3
Complexity : Simple
Folding Instruction
    Video : About.com
Paper : 1/4 of 3*3 Inch one side coloured square paper . 2 square papers

It can be treated as a 2D as well as 3D model as it can stand too. It requires 2 squares,one each for head and body.You can assemble using glue or just tuck the body part into the pocket created in the head even though that would be very frail assembly but that's an option.

Good model for card making.


Thursday, April 14, 2011

Origami Cat-2

Day 133 - Origami Cat-2

Model : Origami Cat-2
Complexity : Simple
Folding Instruction
    Photo Instructions : Card Making @ CircleOfCrafters.com
Paper : 3*3 Inch one side coloured square paper . 3 square papers

It's turning out to be a origami cat week,though I didn't search the models intentionally but found them interesting and moreover easy.

It's a 2D model. I stumbled upon this cat model on a card making site called Card Making @ CircleOfCrafters.com.This cat requires 3 square papers .one each for face,body and tail.
The units are to be assembled using glue.


Wednesday, April 13, 2011

Origami Cat-1

Day 132 - Origami Cat-1

Model : Origami Cat-1
Design : Hiroaki Takai
Complexity : Simple
Folding Instruction
    Diagram : Diagramed by Hiroaki Takai
Paper : Post-it notes.Rectangle

This is a cute little cat .I traced this model from the website www.origamispirit.com.This model is created by Hiroaki Takai but the page has 2 little cat models of which one is modified form of the model by Hirokai.I could fold only the one diagrammed by Hiroaki as the other one does not have a diagram there nor do I have that much imagination to manipulate and create it.

This model needs a rectangle.You can get that by dividing your regular square in half. Preferable to use both side same coloured paper for the model.One needs to be careful while shaping the ears of the cat else its an easy model.


Sunday, April 3, 2011

Origami Hello Kitty

Day 122 - Origami Hello Kitty

Model : Origami Hello Kitty
Design : Sanrio
Complexity : Simple
Folding Instruction
    Video : Happytruffles
Paper : 3*3 Inch one side coloured square paper: 3 squares used

This is a 2D model made out of three pieces of square paper folded and glued together depicting the famous Fictional character Hello Kitty


As its a glue fixed model so I suppose we can't call it pure origami.This is a good model for greeting cards for kids.

Video :-

Tuesday, March 29, 2011

Origami Rooster 1

Day 117 - Origami Rooster 1

Model : Origami Rooster 1
Design : Traditional
Complexity : Simple
Folding Instruction
    Diagram : www.laurenstringer.com
    Photo Instruction : www.laurenstringer.com
Paper : 3*3 Inch one side coloured square paper

This is a simple model .Easy and fast.I suppose a good one for making cards.

For instructions I would say the diagram is easier to follow than the photo instruction as it is more detailed.

Monday, March 28, 2011

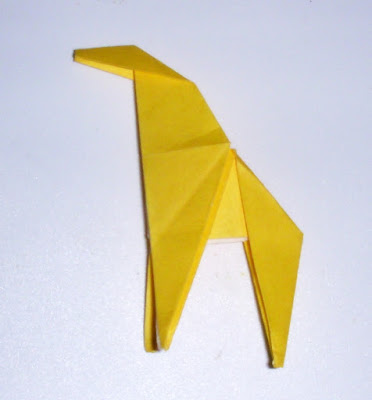
Origami Giraffe

Day 116 - Origami Giraffe


Model : Origami Giraffe
Design : Traditional
Complexity : Simple
Folding Instruction
    Diagram : www.laurenstringer.com
    Video : Tavin
    Book : Super Quick Origami Animals by Nick Robinson
Paper : 3*3 Inch one side coloured square paper

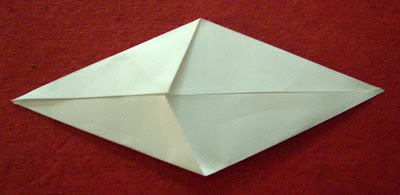
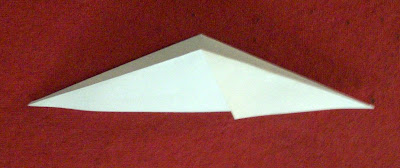
This is a traditional origami model.It starts with origami bird base.I followed the video on Tavin's Channel This video is of 8 minutes but the actually folding after the bird base starts at 2.50 minutes and ends by 5.20 minutes. It's a nice tutorial and easy to follow.


The final model had pointed face and pointed legs which I have squared a bit because I thought it would look better.

Video:-

Thursday, March 24, 2011

Origami Sheep

Day 112 - Origami Sheep


Model : Origami Sheep
Design By : Traditional
Complexity : Simple
Folding Instruction
    Diagram : Origami Club - Sheep
    Animation : Origami Club - Sheep Animation
    Video : Japonyol
Paper : 3*3 Inch 1 side coloured square paper

This model would look best with the standard origami paper one side coloured and one side white.You would need a pen to draw the eyes and the nose.

This is a 2D model but it can stand if you slightly stretch open the first two legs.

Video :-

Tuesday, March 15, 2011

Origami Dove

Day 103 - Origami Dove


Model : Origami Dove
Design By : Alice Gray
Complexity : Simple
Folding Instruction
    Video : Danbergam
Paper : 3*3 Inch white square paper

Origami dove is a traditional model.It resembles the peace dove so it can be used for spreading the message of peace just that you need to add an olive branch.

Though it's a simple model I messed up with the first attempt because I skipped the first step and created a triangle base.

Here is a video on the youtube channel by danbergam.


Video:-

Friday, March 4, 2011

Origami star - 2

Day 92 - Origami Star - 2

Origami 4 point star is made of a single square sheet of paper.You can use both single side coloured or duble side coloured sheet.I have used a single side coloured square sheet of dimension 3*3 inch.

Front view of the star

The model starts with origami bird base.Though the model is simple there are certain places where you need to take care like:-
  1. Sinking of the top triangle of the bird base to get the centre of the star.If yu are nt careful it may tear up.
  2. Folding in the back where you need to do the small folds between the arms of the star .If you are making a small star it really difficult to fold this part , so I would suggest the beginners to start with a fairly large paper.

Backside view of star

Here is a stop-motion video on channel Origami768 .Also you can check the blog by the same author called Origami where you can find some more origami tutorials.


Thursday, March 3, 2011

Origami star - 1

Day 91 - Origami star

One more design of origami star.This one needs 2 square pieces of paper.You can use both single side coloured or double side coloured papers.


I have used Post-it paper for this model.The model is created by František Grebeníček.

The folds are simlar to the origami decoration - variation 1 fold I tried earlier.This one has a little varation.The varations are:-
  1. You need not open the folds to form the petals.
  2. Fold the backside of the decoration to create the pockets.

The two units with back and front views

The two pieces/decoration pieces can be held together by the pockets made by the folds but its not that reliable so you may use glue to keep the units together.

Another arrangement of the 2 units

Folding Instruction:-

Diagram :-
Origami star

Video :-

Wednesday, March 2, 2011

Origami Cherry Blossom

Day 90 - Origami Cherry Blossom


This is a kirigami model rather than an origami model.Basically the flower needs a pentagon to start with.The instructions on the Origami-club starts with a square piece of paper.

You need to fold the square to get a pentagon and on the folds to get the pentagon you will have to cut it into the flower shape.

It's a good one for greetings or decorations.The instruction on origami club also speaks of folding branch for the cherry blossoms.

Folding instructions:- Origami-club


Tuesday, March 1, 2011

Origami Ray

Day : 89
Model : Origami Ray Fish
Folding Instruction :
    Photo Instructions Origami-club
    Video Origami-club
    Video Origami-club
Paper : 3*3 Inch one side colored origami paper


Another of the easy models from origami club.I suppose its the easiest models of ray.If you are wondering what is ray fish then you may check on Batoid on wikipedia.Ray fishes are closely related to sharks.

The above ray is folded using 3*3 inches one side coloured square paper.Though it doesnot look that similar to original ray but it is somewhat similar.Once you draw the eyes the origami ray looks really funny and can become a good cartoon character especially if you are drawing it graphically as I have done.

Here's a pic of original Leopard Ray in the Dubai Aquarium.

Monday, February 28, 2011

Origami Poinsettia

Day 88 - Origami Poinsettia


Origami Poinsettia is a modular flower but its not pure origami as it needs glue to put the petals together so also the leaves.

This model requires three units for the flower and three units for the base leaves.I have used 3*3 inch light green square papers for the leaves units and 1/4th of 3*3 inch square one side red coloured paper for the units of the flower.

Well I suppose a bit bigger squares for the units of the flower would have been better for the size of the leaves I have made.

It's really simple and it makes a nice flower for the cards.

I suppose of the various origami poinsettia models available this is one of the simplest .

Folding instructions:- origami-club


Sunday, February 27, 2011

Origami Penguin

Day 87 - Origami Penguin


This is a 2D model.Origami penguin is a simple model.As it's a 2D model you can use it for making greeting cards.

I have used a 3*3 inch one side black coloured paper.As penguins are black in colour I suppose its proper to use a piece of black paper instead of other colours.

Penguins are such cute animal but my origami penguin is not that cute as the folds dint come that good.

Folding instructions :- origami club

Friday, February 18, 2011

Origami twin swan

Day 78 - Origami Swan parent and child

This is a twin swan made out of single piece of square paper. A lovely model.It is similar to the origami swan just that you fold the tail and wings into the small child swan.

Here is the photo instruction:-

Step 1:-
Fold diagonally to crease and open.


Step 2:-
Fold the corners to the crease as shown below.

Step 3:-
Fold the top corners to the diagonal crease as shown below.


Step 4:-
Fold in half .


Step 5:-
Pocket fold to get the neck of the parent swan.


Step 6:-
Fold the tail part along the black line to get the child swan.


Step 7:-
Pocket fold along the black line to get the neck part of the child swan.


Step 8:-
Fold along the black lines on the neck to get the head and beak


Step 9:-
Draw the eyes to complete and done.


Folding diagram and animation is available at origami-club.

Tuesday, February 15, 2011

Origami seahorse

Day 75 - Origami seahorse

Sea horse seemed easy initially but by the time I finished I was exhausted and confused that's the reason why my sea horse doesn't look like one.I lost patience in the final stages where you shape the head part.


I picked this model from YouTube.This video is good enough just that it uses the creased paper so you may loose the track of creases ( as I lost ).A sincere request for first timers to use a bigger paper instead of small one.It goes well with one side coloured paper.

Monday, February 14, 2011

Origami Heart bookmark

Day 74 -Origami Heart Bookmark

Happy belated valentines day to all.I know I am too late but was held up in work and also misplaced my camera( need that to post the photos of course).

Hmm... So I have an origami heart bookmark for the valentines day as it was the only thing which I could make easily and quickly with the time crunch.I spotted it on Instructables.com , it looked really cute with the heart bookmark made of both side red colour paper,but the photo instruction provided there seemed clumsy and the other instruction methods like PDF etc required joining the website which I didnt have the patience or interest in doing at that moment instead I felt its easier to search another site for instructions.

I found this interesting blog called Ink Stains where I found nice photo instruction for Origami heart bookmark.The instruction here are really clear with wonderful concept of using ink for the patterns on the paper.You may try that too.

Here is the heart bookmark I folded.


This needs a rectangle rather we can say two linked squares to start with and how do we get it,just take standard square and cut it in half n you get the required rectangle.

You can use both one side coloured or both side coloured paper for the purpose.The middle part is similar to the chrysanthemum folds.

I was wondering people can actually use this to propose by putting the message in the chrysanthemum part and putting the bookmark in a book and presenting the same to there valentine( if the valentine is a bookworm :D) .Thats just a thought ...