Monday, February 28, 2011

Origami Poinsettia

Day 88 - Origami Poinsettia


Origami Poinsettia is a modular flower but its not pure origami as it needs glue to put the petals together so also the leaves.

This model requires three units for the flower and three units for the base leaves.I have used 3*3 inch light green square papers for the leaves units and 1/4th of 3*3 inch square one side red coloured paper for the units of the flower.

Well I suppose a bit bigger squares for the units of the flower would have been better for the size of the leaves I have made.

It's really simple and it makes a nice flower for the cards.

I suppose of the various origami poinsettia models available this is one of the simplest .

Folding instructions:- origami-club


Sunday, February 27, 2011

Origami Penguin

Day 87 - Origami Penguin


This is a 2D model.Origami penguin is a simple model.As it's a 2D model you can use it for making greeting cards.

I have used a 3*3 inch one side black coloured paper.As penguins are black in colour I suppose its proper to use a piece of black paper instead of other colours.

Penguins are such cute animal but my origami penguin is not that cute as the folds dint come that good.

Folding instructions :- origami club

Saturday, February 26, 2011

Origami Camel

Day 86 - Origami Camel


Origami camel starts with a square piece of paper.You can use both one side coloured or double side coloured paper.The folds do not expose the other side so I would suggest to use a one side coloured paper.

The folds are almost similar to origami crane except that the beak is folded such that it become face and jaw and the tail into a hind limb .the other 2 limbs are created by folding the wings down ( before that fold the wings inwards to narrow it.

The hump is the same as the middle portion or the body part of the origami crane.

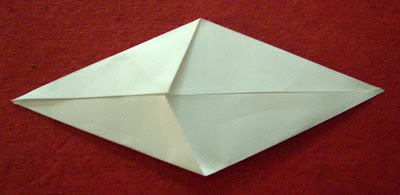
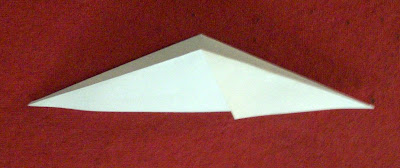
Obviously it starts with origami bird base.

Folding instructions are available at origami-club.It has both folding instruction as well as animation.


Friday, February 25, 2011

Origami star

Day 85 - Origami star


This a traditional origami model.It uses a strip of paper instead of a square or rectangle etc.Very simple model.The tricky part is the ending part where you need to shape the edges and puff it to get the final star.

This is also called origami lucky star ,some call it origami puffy star etc..

Though its very simple but some how I mess it always and never get the cute little star.This is the first time was able to finish it somewhat okay

Folding Instructions:-
opane

Video Instructions:-

Thursday, February 24, 2011

Origami five petal lily

Day 84 - Origami five petal lily


After learning how to get the pentagon from a square piece paper I thought of trying this 5 petal lily.I had stumbled upon this instruction long back but was not able to try it becuase I didn't know how to get the pentagon out of square actually I was lazy to make the pentagon.

I found this instruction on the blog Dream Your Wonders by Adam.This blog has some more wonderful flower folding instructions based on pentagon.

The model starts with a pentagon.The folds are similar to origami lily variation folds.


I have used a Origami sheets of 4.5 Inches Square to get the pentagon.It's normal origami paper.

Wednesday, February 23, 2011

Origami prison break swan variation

Day 83 - Origami prison break swan variation


Yesterday I tried the prison break swan.I found another variation of the prison break swan byBarbabellaatje on the channel "How to make these !!".


I liked this model better than the previous one.The instructions in the video are quite clear .The only suggestion is have patience during the precreasing of the paper in the instruction.

Starting with a larger piece of square sheet would be better for beginners.

Tuesday, February 22, 2011

Origami prison break swan

Day 82 - Origami prison break swan


Before you start wondering why this model is called prison break swan,here is a small intro to it.Prison Break is a TV show in which one of the characters (played by Michael Scofield) folds this origami swan thus the name "Prison break swan".

I found this video tutorial by Barbabellaatje on the channel "How to make these !!".
The instructions are quite clear so its not that difficult to follow.Its a stop motion video.


Diagram:-
Martik Panosian's Blog

Monday, February 21, 2011

Origami carambola

Day 81 - Origami Carambola

This model is created by Carmen sprung.Before we start a little knowledge about Carambola .It is a fruit found in Asia.The model here looks like a flower but its actually a cross sectional view of the carambola fruit.

The model is made out of a pentagon and not a square piece of paper.This is my first fold using pentagon.Its pretty difficult and not for beginners.

My carambola didn't come that pretty but looks somewhat similar.

Does it look a bit sick .:P

I found the instruction on Sara Adams channel "papierfalten's".The video explains how to get the pentagon from square and then how to fold the carambola.


Diagram:-
origamiseiten

Sunday, February 20, 2011

Origami Napkin butterfly

Day 80- Origami Napkin butterfly


Another one of the butterfly models.I found this model on youtube.There is a wonderful video tutorial by Barbabellaatje on the channel "How to make these !!".


Its easy model and I got it in first try.You can start with big or small piece of paper.

It needs a square piece of paper.I have used a one side coloured 3*3 inch paper for the model.

The wings of the butterfly can have more pleates but I have done it with minimum pleates you can try with more pleates.The video explains how to have 4 or 8 pleates of more..

Saturday, February 19, 2011

Origami Tomoko fuse Espiral

Day 79 - Origami Tomoko Fuse Espiral

Origami Tomoko fuse espiral is a modular origami model.It has 4 units.The modules are really simple to fold so is the model.This model is created by Tomoko Fuse and the design is found in her book Let's Fold Spirals.The book is in Japanese but the instructions are pretty much self explanatory


It needs big square sheets of paper.They can be single side coloured or double side coloured.I would suggest to use big one side clouyred square papers and preferably the four units of different colour as it looks really good if the modules are of different colour.

You can follow the video by Origamiancy


This video is really easy to follow.It has the tutorial for both the units and the final assembly of the units to get the sprial.

The actual fold in this model start while assembling and not in the units.It doesnot use glue to assemble the units rather it uses folding :)

Here is my Espiral.


Friday, February 18, 2011

Origami twin swan

Day 78 - Origami Swan parent and child

This is a twin swan made out of single piece of square paper. A lovely model.It is similar to the origami swan just that you fold the tail and wings into the small child swan.

Here is the photo instruction:-

Step 1:-
Fold diagonally to crease and open.


Step 2:-
Fold the corners to the crease as shown below.

Step 3:-
Fold the top corners to the diagonal crease as shown below.


Step 4:-
Fold in half .


Step 5:-
Pocket fold to get the neck of the parent swan.


Step 6:-
Fold the tail part along the black line to get the child swan.


Step 7:-
Pocket fold along the black line to get the neck part of the child swan.


Step 8:-
Fold along the black lines on the neck to get the head and beak


Step 9:-
Draw the eyes to complete and done.


Folding diagram and animation is available at origami-club.

Thursday, February 17, 2011

Origami curler cuboctahedron kusudama

Day 76,77 - Origami curler cuboctahedron kusudama

Origami curler units are really simple and fast to make .They start with origami waterbomb base.

For a cuboctahedron kusudama you need 12 curler units .Sounds easy ,right!But hold on the assembly of the units is not that easy.It took me a day to understand the assembly and once I understood I felt it was easy.


Few of the curler units

I have used the Neon post it 3*3 inch papers for the curler units and the assembly doesnot require glue .I suppose that is one of the best things .

A suggestion to first timers is to use 3 differnt colours so that you can understand the assembly of the units though its not that necessary but thats just a suggestion.

Final curler cuboctahedron kusudama

Video Instruction:-
This is a nice video which teaches both the curler units and the curler cubotahedron kusudama.


Tuesday, February 15, 2011

Origami seahorse

Day 75 - Origami seahorse

Sea horse seemed easy initially but by the time I finished I was exhausted and confused that's the reason why my sea horse doesn't look like one.I lost patience in the final stages where you shape the head part.


I picked this model from YouTube.This video is good enough just that it uses the creased paper so you may loose the track of creases ( as I lost ).A sincere request for first timers to use a bigger paper instead of small one.It goes well with one side coloured paper.

Monday, February 14, 2011

Origami Heart bookmark

Day 74 -Origami Heart Bookmark

Happy belated valentines day to all.I know I am too late but was held up in work and also misplaced my camera( need that to post the photos of course).

Hmm... So I have an origami heart bookmark for the valentines day as it was the only thing which I could make easily and quickly with the time crunch.I spotted it on Instructables.com , it looked really cute with the heart bookmark made of both side red colour paper,but the photo instruction provided there seemed clumsy and the other instruction methods like PDF etc required joining the website which I didnt have the patience or interest in doing at that moment instead I felt its easier to search another site for instructions.

I found this interesting blog called Ink Stains where I found nice photo instruction for Origami heart bookmark.The instruction here are really clear with wonderful concept of using ink for the patterns on the paper.You may try that too.

Here is the heart bookmark I folded.


This needs a rectangle rather we can say two linked squares to start with and how do we get it,just take standard square and cut it in half n you get the required rectangle.

You can use both one side coloured or both side coloured paper for the purpose.The middle part is similar to the chrysanthemum folds.

I was wondering people can actually use this to propose by putting the message in the chrysanthemum part and putting the bookmark in a book and presenting the same to there valentine( if the valentine is a bookworm :D) .Thats just a thought ...

Friday, February 11, 2011

Origami chicken born from egg

Day 73 - Origami chicken born from egg

Origami Chicken born from egg model is a cute little model.It is quite simple 2D model.It starts with a square base and has a few simple folds.Its perfect for easter greeting card making.

I have used a 3*3 inch one side yellow and one side white square paper.


Folding Instruction:-

Diagram and Animation:- Origami-club

Thursday, February 10, 2011

Origami Iris Kusudama

Day 69,70,71,72 - Origami Iris Kusudama


Origami Iris Kusudama is made of 12 + 12 a total of 24 modules.The modules are the simple origami iris or origami lily .I never knew they can be made into a kusudama but thanks to the tutorial by barbabellaatje on youtube.

This kusudama may not be called as pure origami as it requires glue but you can try your hand on it.

To start with you need 12 iris to make the ball and 12 more are required to make a second layer. I have made 12 origami lily of variation type of green colour for the ball and 12 traditional lilies of orange colour to make the second layer.

The 12 liles are glued to each other in such a way that the 12 lilies make 6 squares and 8 triangles basically a cuboctahedron to make the ball.Once the ball is done its just putting the second layers to give the finishing touch.

The gluing part is really cumbersome and one needs to have patience for the same also a good glue specially when your units are small ( as in my case ). As my flowers are small I glued them first and then made the ball.


Folding Instructions:-
Video:-

Sunday, February 6, 2011

Origami Butterfly - 1

Day 68 - Origami butterfly - 1

This week I don't have a specific theme.I am going to pick anything interesting.

Origami butterfly - 1 ,I have named it so coz I don't know the actual name . I found the model on Joost Langeveld Origami Page and it was named as origami butterfly there.


The model starts with bird base folds.The difficult part is the antenna of the butterfly. The fold isn't that clear which makes it fold further but if your try 2-3 times you will be able understand it. Even though the model is not that tough I would suggest to start with a bigger paper ,so that its easier to understand the folds.

To me this model looks more like a moth than a butterfly but nevertheless its a good one to try your hands on.

Saturday, February 5, 2011

Origami Dress

Day 67 - Origami Dress


This is a simple,one piece origami dress made out of one square piece of paper.Use a contrast coloured paper or one side coloured paper for the model .It looks better and the model come out better.

Folding Instructions:-

Diagram and animation Origami-club.

Photo Instructions:-

Step 1 :-
Pre crease in half and then pre crease along the black line as shown below.


Step 2 :-
Fold along the black line outwards to get the collar.


Step 3 :-
Fold along the black line backwards to get the shoulder.


Step 4 :-
Step fold along the black line.


Step 5 :-
Fold along the black line backwards.


Done

Friday, February 4, 2011

Origami Apron

Day 66 - Origami Apron


This model is really nice as its a full dress ,I mean a full apron .I feel it looks like its really cool dress rather than apron.

Folding Instruction:-

Diagram and animation at origami-club.

Photo Instruction:-

Step 1:-
Start with white side up.
Fold in half to pre crease and then unfold.
Fold the paper to the centre line as shown below


Fold along the black line to pre crease.


Unfold


Step 1:-
Fold along the black line as shown below.


Step 3:-
Turn it over and fold along the black line outwards.


Step 4:-
Fold along the black line


Step 5:-
Step fold along the black line


Step 6:-
Fold along the black line to pre crease and unfold .Turn it over


Fold the crease back and fold the 2 edges to the centre


Step 7:-
Fold along the black line


Turn it over and done.