Showing posts with label Origami insects. Show all posts

Wednesday, March 16, 2011

Origami Snail - 2


Day 104 - Origami Snail - 2

Model : Origami Snail
Design By : Toshie Takahama
Complexity : Medium
Folding Instruction
    Video : Happypuppytruffles
Paper : 4.5 Inches


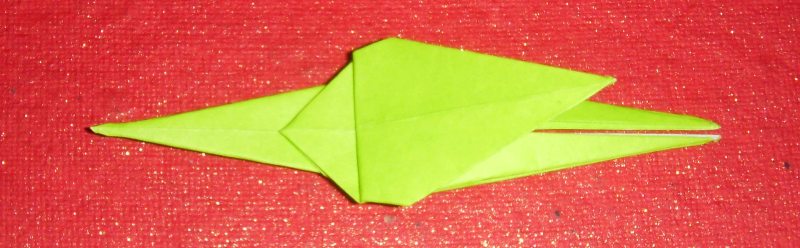
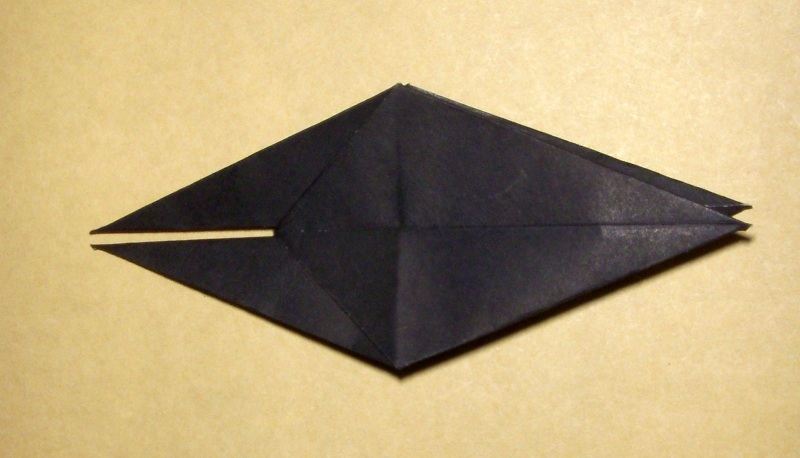
Another of those snails.This snail has a tail too :).Coming to folding details.The folding starts with square base and further the foldings are similar to origami iris fold .The foldings can be divided into 3 parts.
  1. Folding to get the head and antenna.
  2. Getting the tail.
  3. Expanding/opening the shell.This is bit tricky be careful else it would rip off.I actually was careless and it ripped.


Video:-

Sunday, March 13, 2011

Origami snail - 1

Day 101 - Origami Snail - 1

Model : Origami Snail
Design By : Traditional
Complexity : Medium
Folding Instruction:
    Diagram : The fold
    Video : Super1600
Paper : 4.5 Inches


While folding the origami heart ring yesterday I found this paper napkin origami snail instruction on the YouTube channel by super1600.

Origami snail starts with a square base and going ahead the folds seem similar( not the same though)to the origami bird base.

The Instructions can be divided into 2 parts.First part explains to get the head and antenna and the second part to blow the shell.

One needs to take care while puffing the shell else it would rip the paper.The head and antenna folding is bit cumbersome.The instructions on the video are good but due to the use of the paper towel and white colour the instructions are not that clear at certain points.You need to watch the video carefully to understand how the antenna and the head is made.

Video Instructions:-


Monday, January 31, 2011

Origami Insects this week

Here are the insects folded this week.


The lady bug loos really big and the dragonfly looks like too tired to face us :)

Sunday, January 30, 2011

Origami Mantis


Day 61 - Origami Mantis

This is not the praying mantis by Robert lang but its a simple origami mantis which has cutting thus not pure origami.The mantis after final touch looks like 3D model.

This one too starts with bird base.

You can find the diagram at origami-club

Photo Instructions:-

Step 1:-
Start with Origami bird base.Fold along the black line to the center on both the sides.


Step 2:-
Fold the top  flap down along the black line as shown below


Step 3:-
Turn the model over


Step 4:-
Fold along the black line


Turn the model over.


Step 5:-
Step fold along the black line to get the head.


Step 6:-
Open the model sideways


Step 7:-
Cut the model along the black line on both sides as shown below.


Step 8:-
Fold it back


Turn over


Step 9:-
Pull one of the flaps to the top to form the fore legs leaving the other flap down to form the hind legs and fold the model in half.


Step 10:-
Fold the legs


Step 11:-
Draw the eyes and its done

Saturday, January 29, 2011

Origami Scorpion

Day 60 - Origami Scorpion


This is a simple origami scorpion design and has cutting towards the end to get the legs of the scorpio.Thus its not pure origami rather kirigami.

It starts with origami bird base.Though the scorpio doesnt look so cool but its not that bad.I suggest to use both side same coloured paper coz the cuts may expose the other side.

Photo Instruction:-

Step 1:-
Start with origami bird base.Fold to the sides and pull the flap down.


Step 2:-
Pocket fold the top two flaps along the blue line.


Step 3:-
Pocket fold along the blue lines to get the claws


Step 4:-
Fold backwards along the blue line to slim it on both flaps


Step 5:-
Step fold the upper flap along the blue lines


Step 6:-
Cut the lower flap along the blue lines


Fold them up to get the legs of the scorpio


You can get the diagram at origami club .

Friday, January 28, 2011

Origami Cicada

Day 59 - Origami Cicada


Cicada insects have large eyes wide apart on the head and usually transparent, well-veined wings.Origami Cicada though doesnot look like the real cicada but it looks cute enough for kids to try .

Its a simple model so here we go with the photo instruction.

Photo Instruction:-

Step 1:-
Fold diagonally to crease and open the paper


Step 2:-
Fold to the center as shown below


Fold along the black line and tuck in.


Step 3:-
Do a step fold along the black line


Step 4:-
Fold along the black line backwards.


Step 5:-
Fold along the black lines backwards


Step 6:-
Fold along the black line backwards


Step 7:-
Turn it over and fold at the base side to get the triangle


Open the bottom as shown below and pull out to form the triangle


Step 8:-
Turn it over and draw the eyes and its done.


Diagram and animation can be found at origami club